This description may seem complicated at first. But keep in mind that I've tried to describe all of the special situations that may come up while dealing with different functions. Under normal circumstances, you will only need about 20-30% of this description in order to sucessfully use the App to its full extent. For example, logging today's service for one existing customer including logging the payment and next appointment takes only 30 seconds to 1 minute on average.
When using this application, please use the provided buttons to navigate the pages. If you press the Back button on your phone or browser, it may lead to unexpected results or errors, and you could mess up your database. The only exception is the Calendar View. See the relevant section of this description for more details.
Overview
1. Main menu
2. Top navigation bar
3. Contacting customers through the App
4. The Today button
5. Customer Status
6. Quotes
Help Section
1. How to add a new customer
2. How to edit existing customer details
3. How to add a new service record for a customer
4. How to log a payment
5. How to check your turnover
OVERVIEW
1. Main menu
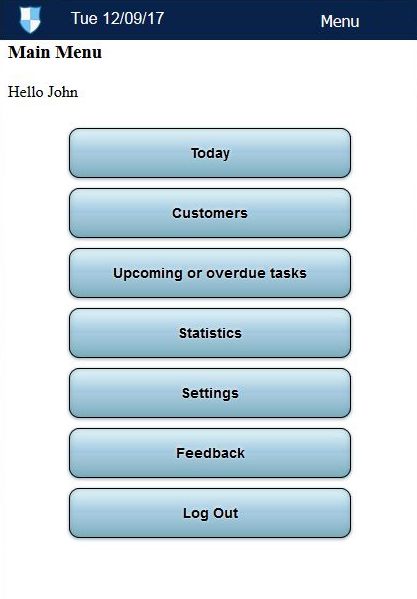
This is the current view of the main menu - pretty much self-explanatory. Here you find the Today function with tasks planned for today. Customers button leads to a sub-menu for adding new customers and editing existing customer details. Upcoming or Overdue Tasks will open a sub-menu for planned cleanings and other tasks as well as overdue contacts and open payments. Statistics lets you keep track of your earnings and spendings. Settings allows to edit your personal detais, shows your subscription details and lets you edit your date and time format preferences. Feedback allows the users to send their input about the app to the developer.
Back to top
2. Top navigation bar
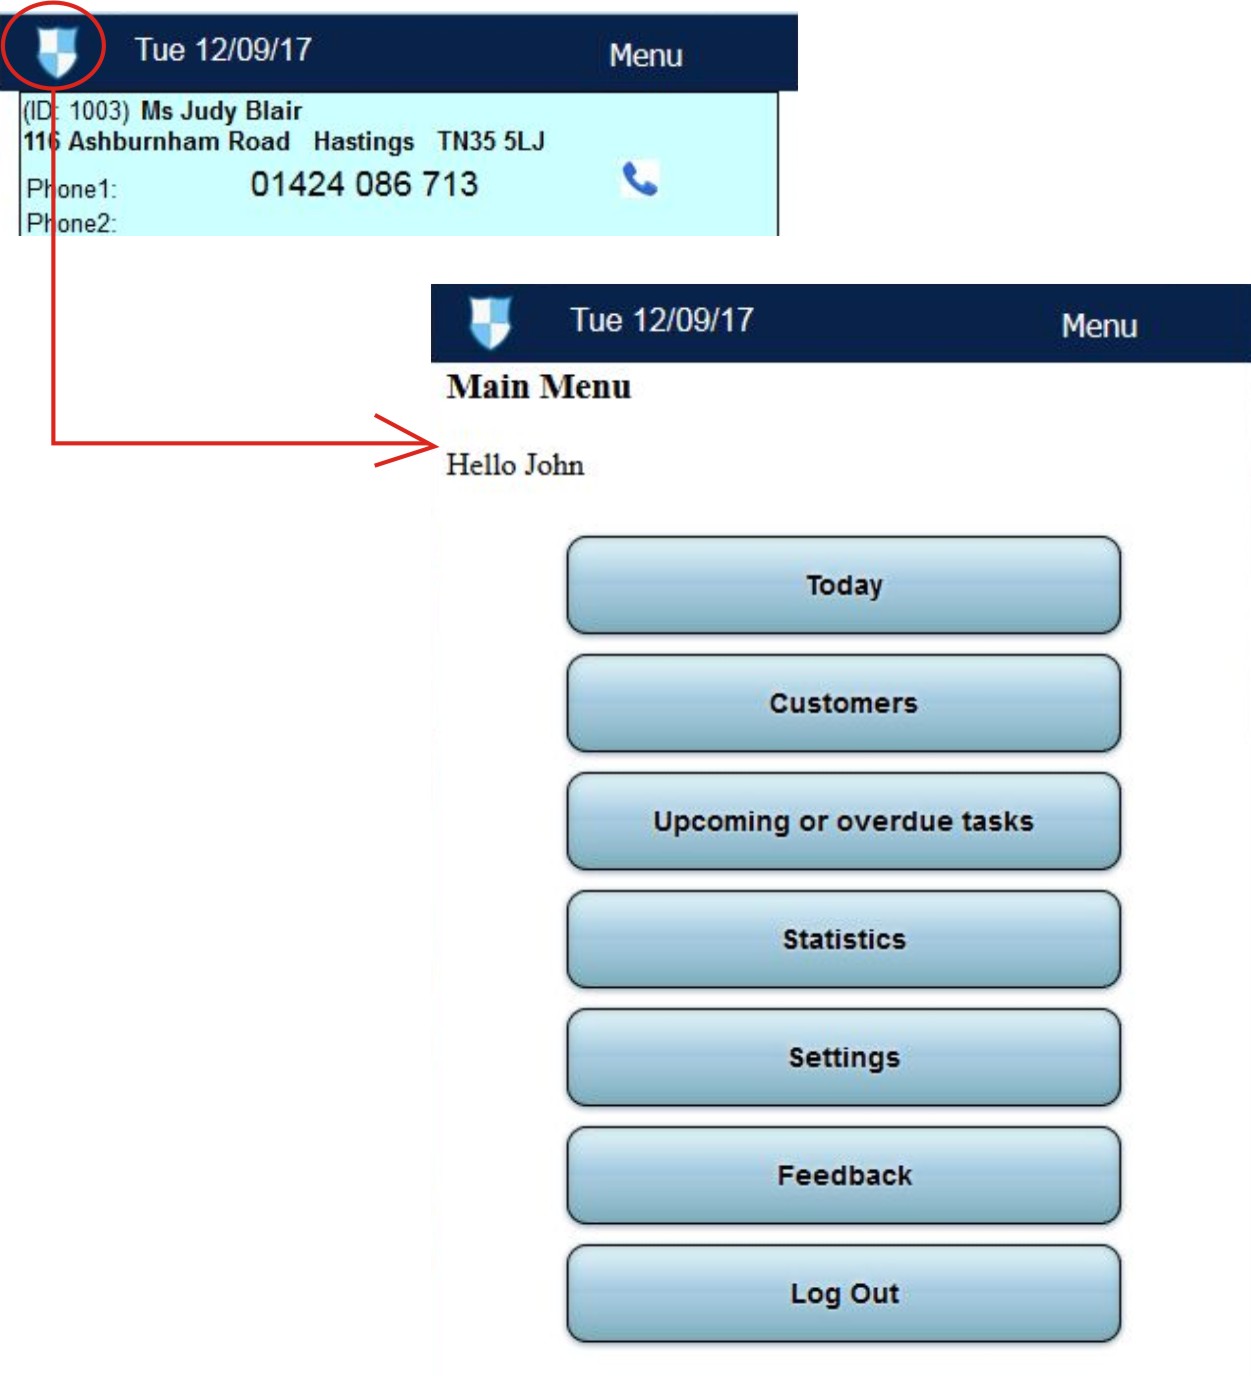
The Home button will lead you back to the Main Menu, no matter which page of the App you are currently on.
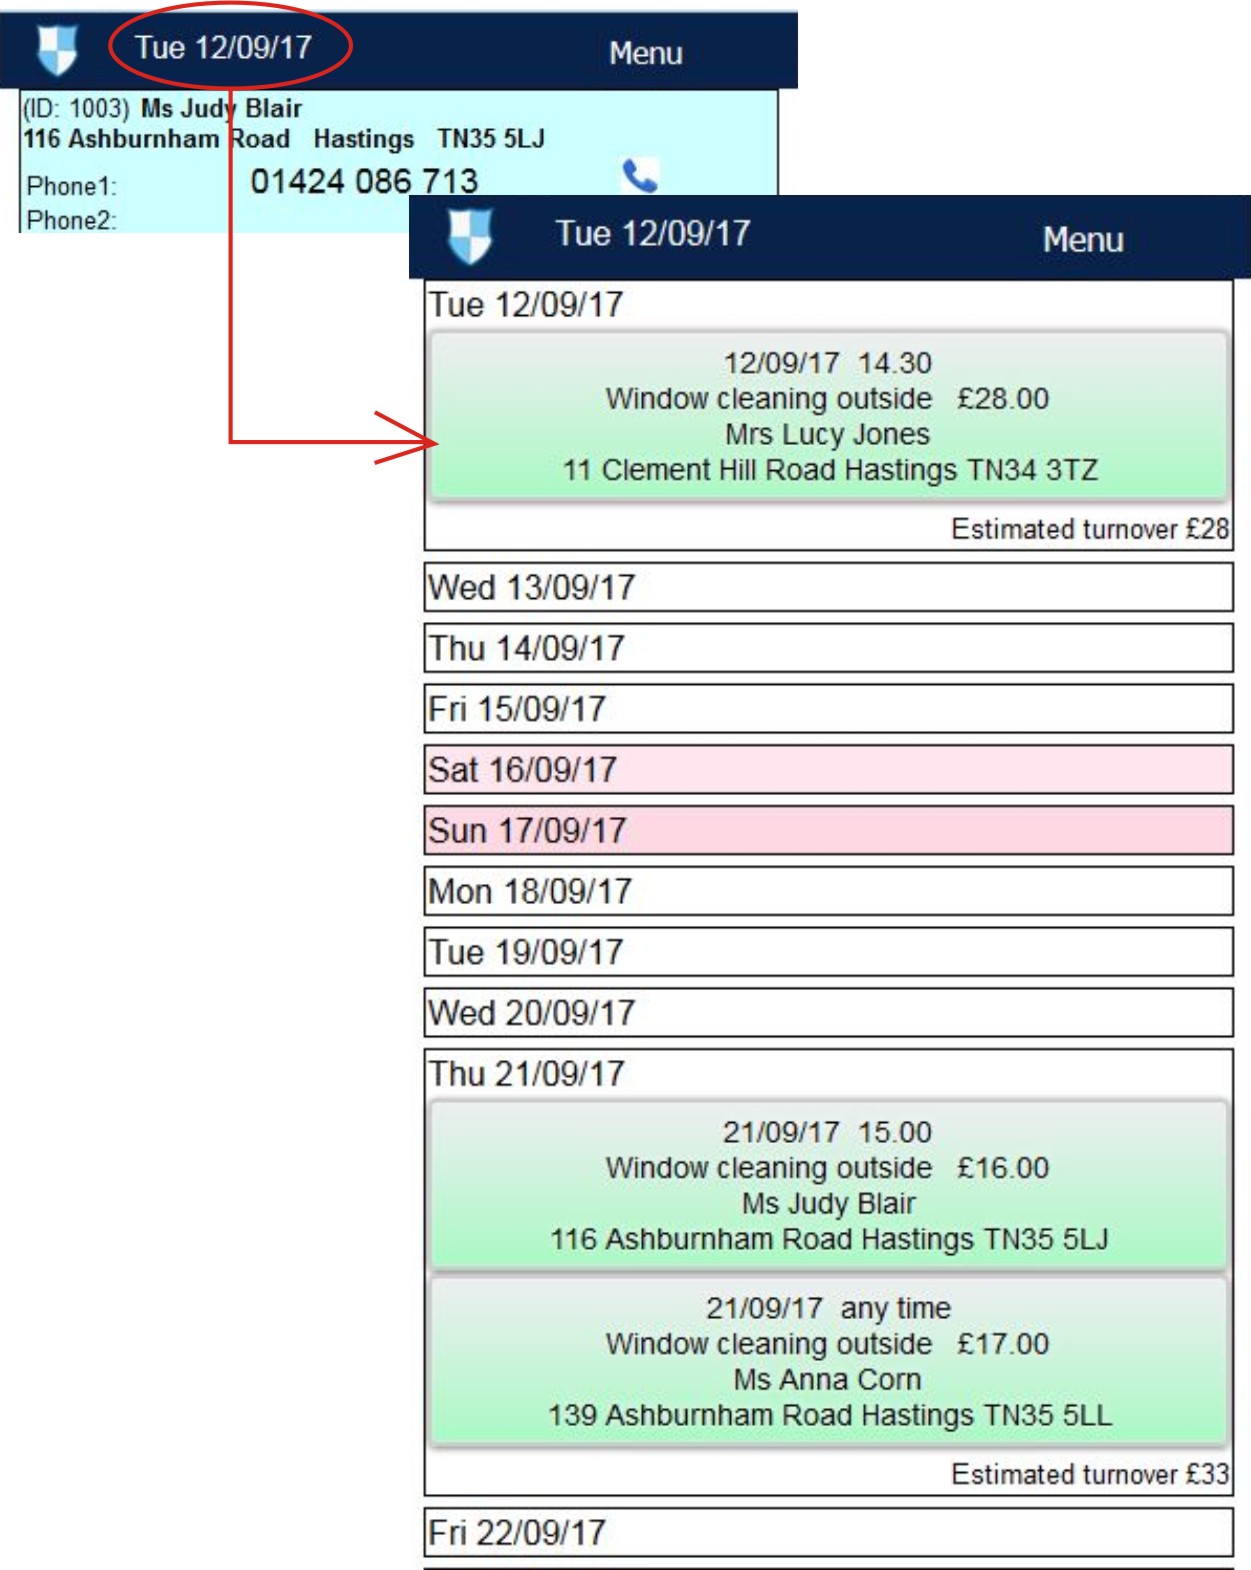
If you tap on the date at the top of the page, a calender list will open with all of your planned cleanings.
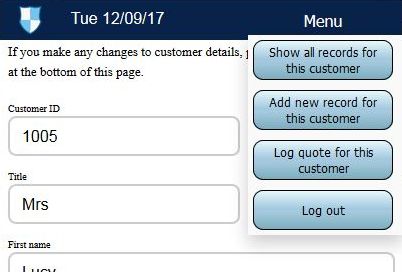
The Menu button on the navigation bar opens up a short sub-menu with a list of functions related to the page you are on.
Back to top
3. Contacting customers through the App
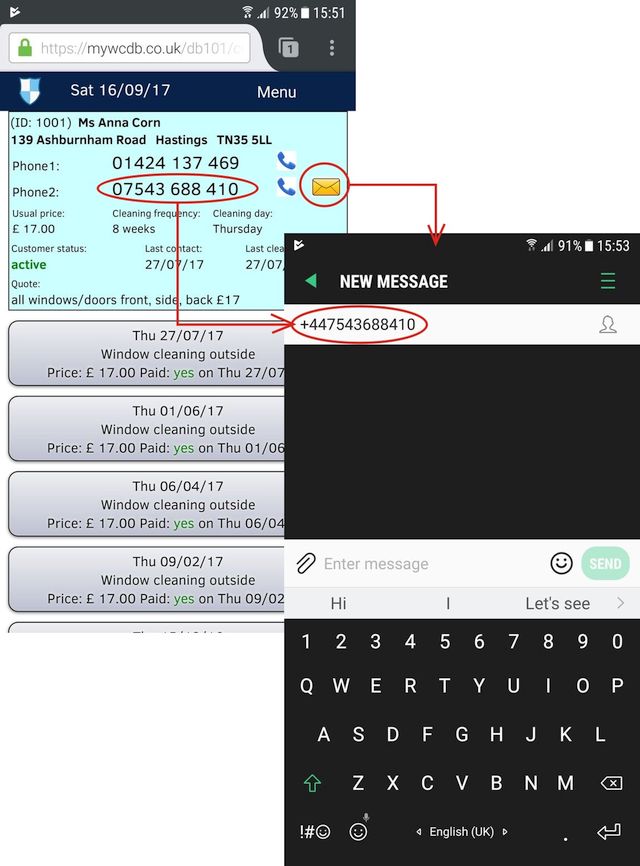
Most of the App pages contain a brief summary of customer details on top of the screen. You will see small symbols of a telephone or a letter next to phone numbers or email addresses. If you tap on these symbols, you will be taken straight to the phone, text messaging or default email application on your device. Customer's contact details will automatically get transferred into the relevant application allowing you to make a phone call or write a message without the need to write down or copy phone numbers or email addresses. And for your convenience, the first zero in a phone number is automatically replaced with the UK international country code (+44), so you can make calls and send messages with ease even from abroad.
Back to top
4. The Today button
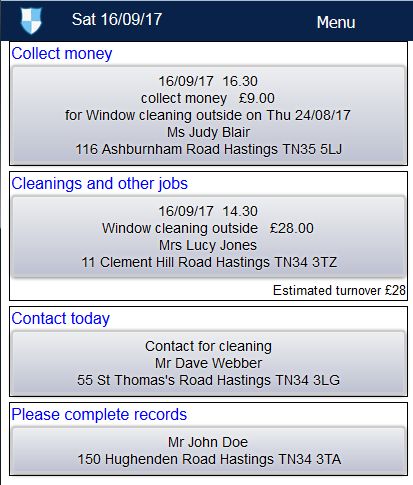
The Today button brings you to a list of actions planned for today. You will see up to four categories of actions on this screen: payment collections, cleanings, contacts and incomplete records. Tapping a gray button in any category will lead you to the page where you will find more information about this task or can log relevant action.
Cleanings and Other Jobs is a list of all the cleaning jobs you have scheduled for today as well as special services you offer to your customers, such as gutter cleaning or fixing something or anything else.
Contact Today will show you all the customers you wanted to contact today to arrange a cleaning appointment and also customers who already have an appointment with you but need to be reminded about that appointment.
The category Please Complete Records refers to entries that miss some important data.
Back to top
5. Customer Status
The App allows you to assign different statuses to your customers. By default, there are three options: active, inactive or dead. However, you can also add any other status to the database, like "sold" or any other desired status.
It is important to know that the "active" status is used in many other functions of this App, like Overdue Tasks or Calendar and even Open Payments. So, please be sure to mark active customers as "active" when adding them to the database or editing customer details in order to have them show up in different other lists of the system.
I personally assign "active" status to customers that are either regular or not regular, but no troubles with payment. In essense, where everything is okay and they are happy with me cleaning their windows.
"Inactive" status is for customers, who I've serviced before, but who have cancelled the service due to some personal reason (sickness or moving house), and also customers, who call me from time to time, but I have no means to contact them myself.
"Dead" is assigned to customers who either don't pay or in general present too much trouble and therefore are time-wasters.
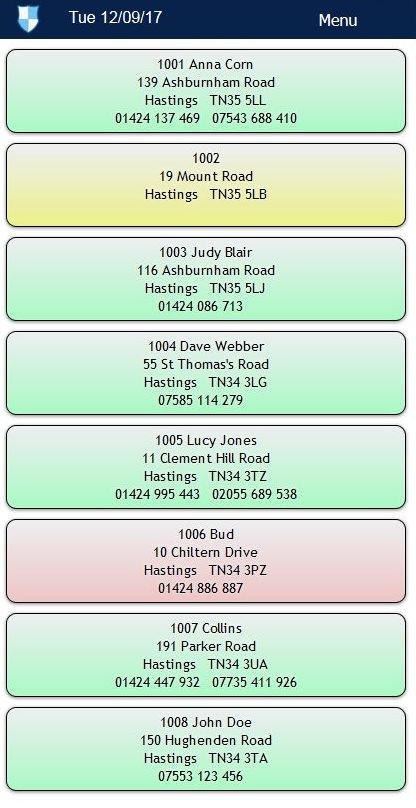
The customer status will be indicated by different button colours in certain lists (as in the picture above). Active status is green, inactive is yellow, dead is red and everything else is gray.
Back to top
6. Quotes
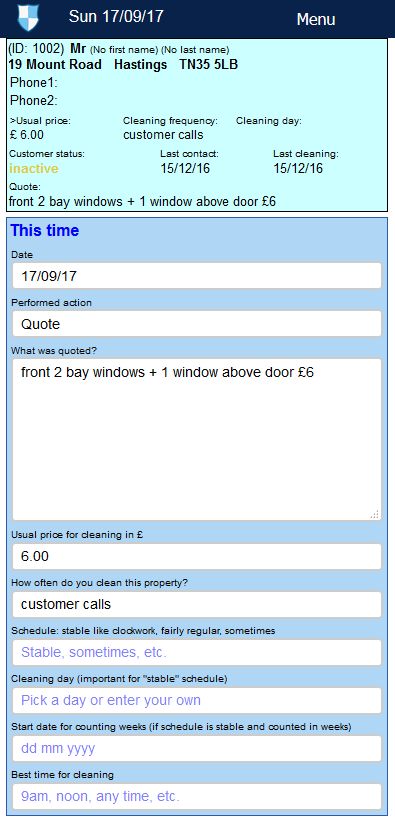
It is important to log a quote you gave to the customer right after you've added a new customer to the database or as soon as you gave the quote. Fill out the quote details and don't forget to log the usual price, frequency of cleaning, schedule status and other relevant fields. The reason for this is that the system will take this information and automatically display the regular price and other details in your Today tasks and also will include the customer into the Calendar schedule based on the frequency you've set up.
There are two ways to log a quote or relevant details. First one: you will be prompted to log a quote when adding a new customer to the database. Second: by using the Edit Customer Details button. In this case, you will see the fields from the picture above in the lower part of the Edit Customer Details form.
Back to top
HELP SECTION
1. How to add a new customer
To add a new customer to your database, go to Main Menu and tap on the Customers button. The following screen will come up:
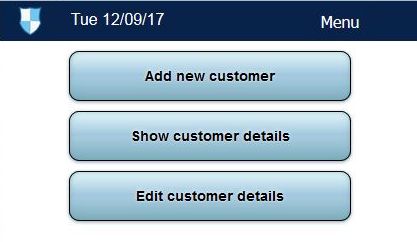
Tap the Add New Customer button.
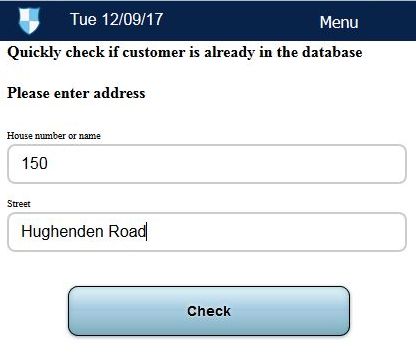
On this screen, you will be prompted to check if the customer is already in the database. It can happen that a customer has contacted you a long time ago and never got back to you after a quote and now is contacting you again, and you might have forgotten about it. If you input an existing customer into the database again as a new customer, a double customer entry will be created that may mess up your records and make it harder for you to keep track of appointments.
Input the house name or number and street name. Once you tap the Check button, the system will quickly check if there is already a customer at that address.
If yes, the next screen will have a list of all existing customers at that address. You can either tap on the relevant customer button, look through all the customer details and previous agreements and edit them as necessary, or, if no such customer exists yet, you can tap the Add New Customer button to go to the New Customer form.
If no existing customers were found at the address you've input, you will be forwarded straight to the New Customer form.
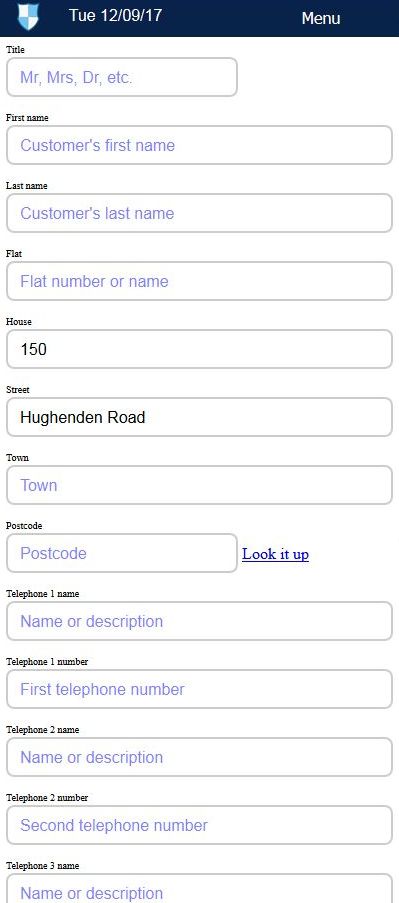
This is the New Customer form where you can enter all the relevant details for a new customer. Add as many details as possible, most importantly the address and at least one telephone number.
In order to help you to find the correct postcode, there is a link Look It Up that leads to the Royal Mail postcode Checker (see next picture).
Fields Telephone Name are there so you can give a name to the number, like "office" or "home". If you have two mobile numbers, one for the husband and one for the wife in the same household, you can use these fields to assign their names to relevant telephone numbers. If no name is entered, the App will use the default Telephone 1 as a description.
The field Contact Source lets you specify how you got the customer: a leaflet, a referral, etc. You can leave it empty if you are not interested in this informtion.
The last field Customer Status is important (as explained in the section "Overview - Customer Status"), so please don't leave it empty. Once done, press Save Customer's Details.
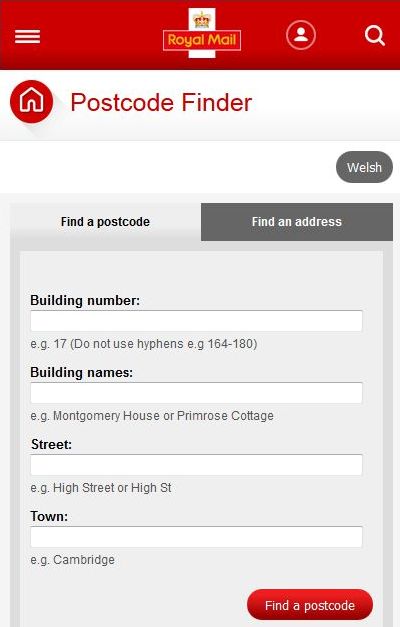
Here you can input the address and check the postcode for that address. Then copy and paste the postcode into the New Customer form. This page will open in a new tab to ensure that the details you've already added into the customer form are not lost. Do not press the Back button on your phone or browser after checking the postcode, but simply close the tab instead.
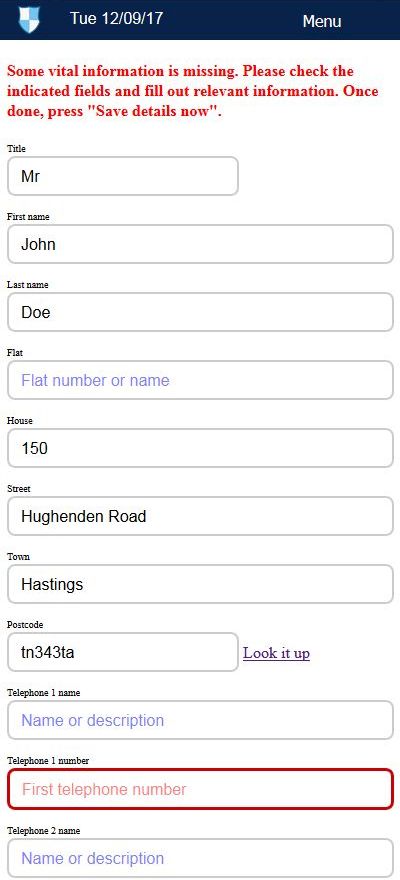
After pressing Save Customer's Details button, you will see one of the screens pictured either above or below. If you see the above page, you have missed some vital information while inputting customer details, so the App is asking you to review it. You can either add missing information or leave it as it is (if you don't have any more details) and press Save Details Now.
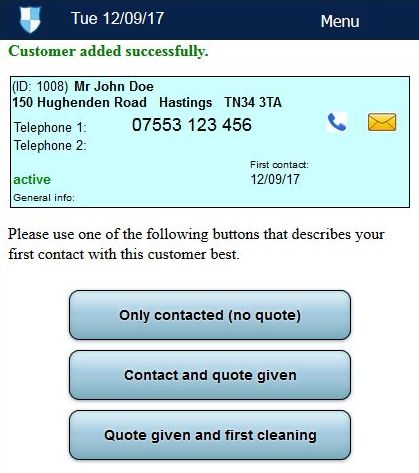
This is the screen with a confirmation that a new customer was successfully added to the database. You will be forwarded to this screen if you either input all relevant customer details into the New Customer form or if you press Save Details Now after correcting customer information.
Choose one of the three options given on this page that best describes the action you've performed in regards to this customer.
Back to top
2. How to edit existing customer details
This is very similar to adding a new customer to the database. Go to Main Menu and tap on the Customers button. Choose option Edit Customer Details. On the next screen, input search criteria and find the customer you want to edit. If you don't enter any customer details into the search form, you will get a list of ALL your customers. To avoid that, enter one or two search criteria.
Once you start typing in any field, a drop-down list of all entries already in the database will come up. Press Search and choose the customer you want to edit from the list on the next page.
The Edit Customer form is very similar to the New Customer form. The only difference is that it additionally contains information about quotes and scheduling.
Change any necessary details and press Save Changes.
You will also find the button Edit Customer Details on different pages in the sub-menu in top right corner of the screen (usually, on pages where you can see a box with customer details).
Back to top
3. How to add a new service record for a customer
There are a few different ways to come to a form to add a new service record for a customer:
- Go to Main Menu, press Customers, then tap on Show Customer Details. Fill in 1-2 search criteria and find the customer you need. Tap on the relevant customer in the list of search results and you will see a page with customer info box on top and all past service records. Press Menu in the top right corner of the page and choose option Add New Record For This Customer.
- Same method works with the button Edit Customer Details accessed from Main Menu - Customers. On the page where you would usually edit customer details, you will also find the option Add New Record For This Customer in the Menu in the top right corner.
- You can also find the button Add New Record For This Customer on several other pages in the Menu in the top right corner of the page.
- The button Log Today`s Sevice will show up when you tap on a customer in Today menu. This button will lead you to the page where you can create a new service record.
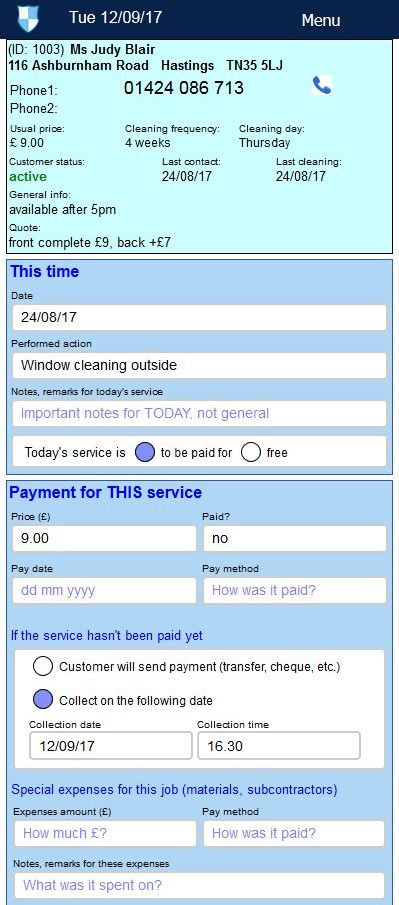
The top box contains the customer details.
Section This Time refers to the service you've delivered today or, if you forgot to log it, to the last time you have been with the customer.
Don't forget to specify if the service is paid for or free (for example, a quote or a contact).
Fill out this form and press Save.

If there are any inconsistencies in the information (for example, the service is "to be paid for", but no payment was entered), the form will come up again and the relevant fields will be marked red. Please look through these fields carefully and correct anything necessary. Sometimes one wrong entry may lead to errors in other fields. For that reason, at the bottom of the page you will find the button Check For Errors. Once you have corrected an obvious mistake, press that button and check if the other fields are okay now.
When done, press Save.
Back to top
4. How to log a payment
Usually you would log a payment right away when logging a service. This section refers to payments that weren't made right on the spot.
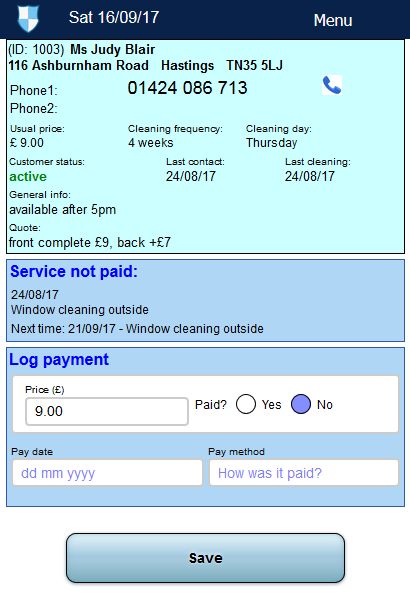
There are several ways to come to the page that lets you log a payment. Most commonly, it will show up in your Today list on the day when the money collection is scheduled. The other common way to access this option is to go to Main Menu - Upcoming or Overdue Tasks - Open Payments.
Once you are on the Log Payment page (see the example above), you will see all basic customer details, the type and date of service you delivered and an option to log payment for this service. The amount due will automatically be there when you open this page. In order to log the payment, choose Yes in the line "Paid?" and enter the payment date and method. Once done, press Save. You will then be taken back to Today page.
Back to top
5. How to check your turnover
To check your earnings for a certain period of time, go to Main Menu - Statistics - Turnover by Date. You will land on the following page:
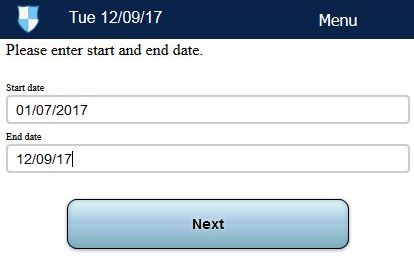
Enter start and end dates and press Next.
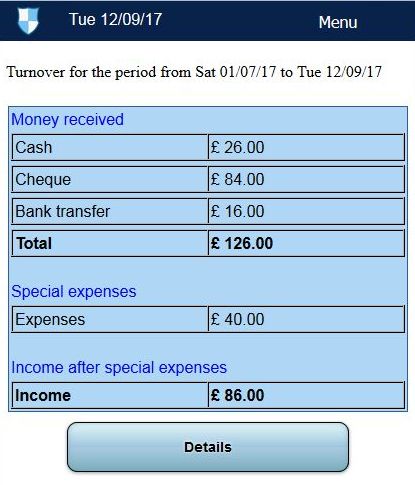
An income report will come up where you can see different income categories and amounts for each as well as special expenses you logged when delivering your services. See the above picture as an example.
Please note that a payment will count into this report on the date it was actually received, not on the date you did the job. Same applies to expenses.
If you press Details buttons, you will see a list of all the services that were included into the report.
Back to top